Posts tagged ‘ELL Activities’

Yodio

A year or so ago Michelle blogged about alternatives to gcast. One of the websites that she mentioned was yodio.com/. Since then, I have had the opportunity to work with the site a little bit. It is an easy, quick, and free way to create slideshows that include not only your pictures, but your voice. It combines podcasting and digital photography.

I have had teachers make a yodio of their autistic students that was used to provide information about that student to staff members. Another teacher is using yodio to showcase her student’s alliteration book. After each child creates their image and sentence, they are recording themselves reading their page. Yet another teacher has used yodio as a way for students to narrate how to solve a math problem. This example is available below:

Teachers can use yodio as a way to track student’s ability to read a piece of text – another fluency check. It can be a great way to showcase a students development not only for yourself, but for students and parents.

A note: if you add your phone number from school and that number doesn’t show up on a caller I.D., then it won’t automatically tie into your account. There is a way to add a password when you use that number so that you can access that podcast on your account.

For ease of use, this is a great way for students to begin creating personalized products.

Dvolver Movies

It has been many, many months since I have last posted, but I decided that I really wanted to post at least one thing over break. I decided to focus on dvolver.com/.

This site allows anyone to create a three scene movie with up to two characters in each scene. Students can choose the setting, the background, the characters (and their dialog), the music, their title, and the title theme. It is a great way to allow students to begin working with these concepts in a more sophisticated way. I have had my students create movies explaining an important historical event, a process, and a “how to” video. They were able to select their topics based upon those three criteria. You could have students create a video on virtually anything. Some ideas would include: how to solve a math problem, a biography of a historical figure (or themselves), how to care for an animal or pet, how to play a game, and why something is important.

Since my students weren’t setting up an account, they had to create their video in one class sitting. I therefore created a graphic organizer where they selected their scene, background, character, and music selections ahead of time. I also have a place for them to write out their dialog. I found that if I just had them try to create it on the fly, they really struggled with not only finishing it within the class period, but also creating a quality product.

Just a small warning before you have your students create their own movies – preview the entire process first. There are several scenes and characters that would not be appropriate for students to use. I do not include those options in the graphic organizer that I created. When I am previewing the site with them, I show them all of the characters and scenes, but quickly point out those that are not O.K. for them to use. I have had no problems with them using inappropriate characters or scenes.

The great thing about dvlover is that you can embed the movies. I have my students embed theirs on their personal page on the class wiki. Click here to view some examples of my students’ movies.

Since I teach in a K-8 school, I can have my students create movies that can be used to instruct younger students or to extend their knowledge. I try hard to have a purpose beyond just completing the assignment for them to consider.

Below is a Jing screencast that I created to explain how to create a dvolver.com/ movie.

Dvolver

This screencast explains how to embed your dvolver movie onto a wikispaces page.

Embedding Dvolver

This is the graphic organizer that I created for my class: dvolver storyboard-1

I have found dvolver to be a great way for my students to create a visual representation of their knowledge.

Fluency

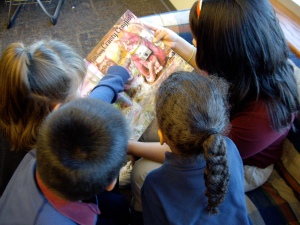
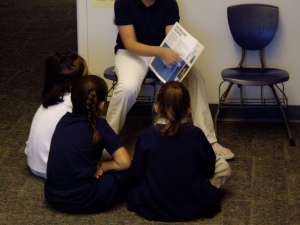
During this summer, I really started thinking about my students’ fluency. As a teacher of LEP and FEP students, increasing their fluency is an important part of moving them toward grade level comprehension. As I always do, I wanted to make the practice of fluency as real world as possible. Luckily, I work in a K-8 building and had developed a relationship with one of the 1st grade teachers. While it probably should have occurred to me earlier, it finally dawned on me that my students could prepare a short book and read it to his class.

After discussing it with the 1st grade teacher and ironing out some details, it looked like it was going to happen. I had decided to piggy back on the concepts and content that he was teaching in class to help us determine which books to read. For example, when his class studied family relationships, my students checked out picture books on that subject to read. This was another way that this project could help build some background knowledge and experiences for his students. In this manner, both groups of kids would benefit. For some topics, my students selected from nonfiction texts, especially when it came to science topics. I feel that it is important for my students to learn how to read both fiction and nonfiction as they require different tones and expressions.

After our first trip, I decided to step things up a notch, and talked to my students about engaging the 1st graders that they were reading to. We talked about asking questions (both comprehension and connecting questions) as we read the book. In this way, the 1st graders would be even more engaged. It also provided a challenge for my students to come up with interesting, relevant questions for the group that they were reading to.

Since my purpose was to focus on fluency, I have videotaped each student read for about 20 seconds each time we visit the 1st grade class. I can then create a video of their clips and track their progress over time. It also allows me to assess how they are reading fiction vs. nonfiction texts.

I must say, my students have really enjoyed this experience. They are becoming more and more proficient and one of the benefits is their progress with not only reading out loud, but the level that they must understand the book and its concepts before they read to the 1st graders. While it is helping the 1st graders build their background knowledge, it is also doing the same for my students.

During the course of the week, my students select a book to read, practice reading it out loud to themselves, practice reading it out loud to their classmates, read it to me, and write down some questions that they can ask. In this manner, by the time we visit the 1st graders, most are proficient at reading their books.

I must say that this project has turned out better than I had hoped. It is an experience that my students look forward to. They do not complain about practicing because they know that a real audience awaits them. At this point, they know that the 1st graders will lose interest really quickly if they don’t perform well, so they always strive to keep it engaging. The first graders love it as well, stopping me during lunch to ask when my class will be visiting them.

Middle school student reading "Anamalia" to 1st graders.

Reading a nonfiction text to 1st graders.

Ning.com

In December, a colleague of mine, Kevin Byers, told me about a site that he was using with his students – Ning.com/. I was curious about the site and decided, after talking to him about it for a while, to try it with my students. Over winter break, I created my classroom Ning. I decided that I would keep the site closed so that I wouldn’t have to worry about it being open to everyone. My students had to access the site by invitation only through e-mail, so I decided that I would use their ePal accounts. After returning to school, I got permission from my principal and was ready to begin the process.

I first had to teach my students about social sites (which Ning is), how to communicate on them, how to navigate to the site, selecting an avatar, and the list goes on. My students loved it immediately. It was something that they were interested in doing not only every day at school, but also at home. After I had buy-in, I knew that I must keep the purpose of the site academically related.

We started by having discussions in the forum section about the books that they were reading. Invitations to join the site were extended to all of my students, but also to administrators and other teachers that were interested in posting information. This became a place where all of my students could communicate.

From there, I moved to embedding videos on the site. The first round of videos were based on what my students were studying in social studies class. For one group, a video on ancient Greece, for another, an archaeological dig, and for the last group, Chinese immigration. After watching the video, there was a question and they needed to respond to it. They could also respond to someone else’s comment. I found that this was an engaging way to bring content into my classroom so that I could support building background knowledge.

While gcast.com/ was free, I was able to embed podcasts that my students had given over various books so that others could listen to it.

Moving into next year, I plan on teaching my students about blogging (as there is a blog feature). I think that this can be a great way to lead into a more technical writing, especially if they begin quoting other sources (which I would like for them to do).

If you decide to start your own Ning (which means “peace” in Chinese, by the way), there are several things to keep in mind.

1. Decide if you want your site to be open or closed. As the creator of the site, you have network creator privileges and select the level of security that you want.

2. You can also decide what types of features that you want on the site (videos, blogs, groups, forums, music, events, etc).

3. You can decide the level of control over what information is posted. For some features, you can establish a requirement that the network creator must approve posts.

4. Each member of the Ning has their own page. As network creator, you can decide if they can change the colors on that page (this was something that I did allow).

5. Since my Ning was for academic purposes, I knew each student’s login information. This was not only a safeguard feature, but also one of practicality. I can’t tell you how many forgot their login information.

6. The content of the Ning is really up to you, the creator and to your members. The sky is the limit!
Amazon Book Review – 1st Post

After my classes created a book review rubric, it was really important to begin writing their first review. One of my criteria was that they must finish a book before they review it.  While that might not always be necessary, a lot of my students struggle to really describe why they aren’t liking a book.  I get a lot of “It’s boring.”  I am working to try and get them to really understand why they don’t like it, but they aren’t all totally there yet, but that is another problem.

They had to use the rubric to write their rough draft.  We talked about what elements they should include in the review and in what order.  Descriptive words, we decided, needed to be added after the rough draft was completed.  It was a polishing area as opposed to a component of the review.  After they finished their rough draft, they edited it for content and word choice.  I then edited it once more.  I had my students write out the review because they are not able to draft on the computer and polish their writing in the 20 minutes that I have in the computer lab.  There is also no way to save the review to complete at a different time.  

After they had created the review and edited it, we headed into the computer lab.  In order to post on Amazon, you must have a customer account.  Additionally, you must purchase something on the account.  If you purchase a book, you can then delete the payment information and still use the account to post reviews.  I had created screen shots to help students log in.  It is quite a process to login to the account, so there were many steps that they needed to follow.  You can see the login sheets here:  Logging in to Amazon.  

I was very glad that I had the screen shots for my students to use and that they had written their reviews ahead of time.  It took them the full 20 minutes (at least) to get the review entered and edited before publishing.  They were very excited about publishing it to the internet – I was as well.

We posted our first reviews in December and have since posted one more round.  They were able to access the account much faster which meant that they had time to edit their typos.  I am now having them post one review a month.

Note:  You might check your Amazon profile to make sure that is shows the reviews you have posted (or find your review under the book’s information).  I have run into a problem with my account.  None of my reviews had posted after my first test.  I have contacted customer service, but the problem hasn’t been totally fixed yet.  You might not have any issues with this, but it is something to keep an eye on.

2nd Note: 4/1/09 – I figured out the posting issue. When your students enter their review, have them select that they are over 13. This will allow the book review to be posted. This was not a privacy issue as the account they were posting under was Mrs. Duarte’s class, so their names don’t appear anywhere. I have also discovered that if one person writes a book review on The 13th Reality, no one else can post a review on it. That means that each student will have to create a review on a different book. This might be a problem depending on how many students you teach, then again, you can always create multiple accounts.

Holiday Letter


As part of my continuing attempt to create authentic writing experiences for my students, I had my students write a holiday letter and mail it to a person of their choice.  There were many benefits and lessons to be learned here – friendly-letter format, summarization (milestones of their year), what a full address is, addressing an envelope, and the purpose of a holiday letter.

Here is what I discovered.  Even though my students are in middle school, most of them don’t know what constitutes a full address, they don’t know how to address an envelope, they have difficulties coming up with things to write about, and they were completely amazed that I was going to mail their letters.

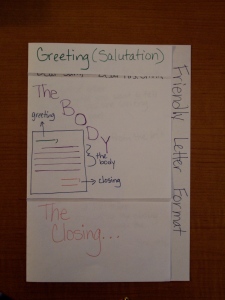
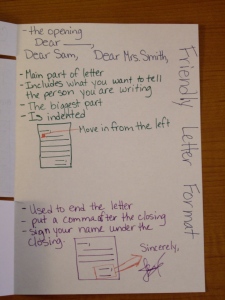
We started by creating a foldable for friendly letters.  They needed to know the format before they could write an appropriate letter.  I created a powerpoint that broke the letter into three parts.  You can view and download the powerpoint here:  http://www.slideboom.com/presentations/36868/Friendly-Letter

This is what their foldable looked like:


Outside of foldable

Outside of foldable

Inside the foldable

Inside the foldable


We stapled these into their spirals so that they could reference them, both for the holiday letter and their epals e-mails.

After they made their foldable, we started talking specifically about holiday letters and their purpose.  I brought several examples for them to peruse.  I prepared a powerpoint that shared topics, mood, and overall purpose for the letter.  This seemed to help several of my students decide on topics and the type of letter that they wanted to write.  You can view and download the powerpoint here:  http://www.slideboom.com/presentations/36907/Holiday-Letter

They finally started writing their letters.  I created a basic letter format that they would copy their final draft onto.  It had some generic pictures and text boxes on it.  It wasn’t that big, so they didn’t have to write a lot of information.  This was actually a good thing, because some of them really struggled with things to write about.

Here is what I would change next time:  I would give them more time to work on the project.  Some students struggled getting all of their information written, edited, and their envelop addressed.  I also need to work further on editing skills.  It is something that they are not proficient at.  I do feel, however, that this was a very worthwhile project and will probably expand it a little and repeat it next year.

Amazon Book Reviews – Rubric Creation

Before my students started writing their own book reviews, I wanted to make sure that they knew the target that they needed to aim for – that is what I call a rubric.  We used the same four sections from the book review highlight activity:  who should read this book?, descriptive words, plot, and opinions.  We added three optional categories:  characters, genre, and rating.  After we had each of the topics that they needed to include, we started filling out a rubric together on the overhead.  Since we had created a booktalk rubric together earlier in the year and they had been assessed on the rubric, they were familiar with the possible scores they could receive in each area:  advanced, proficient, partially proficient, unsatisfactory, or no attempt.  We usually fill out the advanced first, then work our way down the scale.  We listen to everyone’s ideas and come to a consensus.  After we create the rough draft, I type up the information, create an overhead and have my classes review the information.  I want to make sure that they agree to everything on the rubric, because that is what they are going to be required to do.

Each of the rubrics look a little different, based on the decisions of each class.  Here is an example that my class came up with:

book-review-rubric1

So, after the creation of the rubric, it was time for them to write their own book review…to be continued.

Language Arts Stations

I have been working with a teacher who has an 8th grade Language Arts class that has quite a few ELL and SPED students.  She is struggling to find a way to meet the diverse needs in the class, work with students in small groups, and maintain classroom management.  I talked to this teacher about coming in and co-teaching with her.

I met with the teacher to plan out the lesson and decide what she wanted the focus to be.  She has been working on determining the subject and predicate in sentences and is moving into the different types of sentences.  She also wanted to be able to meet with a small group of kids.  We decided to set up stations.  She would create groups based on some classroom data.  That way when a group came to her, she would be able work on specific skills that that group was missing.  The four stations that we decided on were:  teacher station, creating sentences finding the subject and predicate, types of sentences foldable, and a parts of speech bingo.  I would create the foldable, provide the game, and an introduction to types of sentences.  She would create the stations, the subject and predicate station, and her teacher station materials.

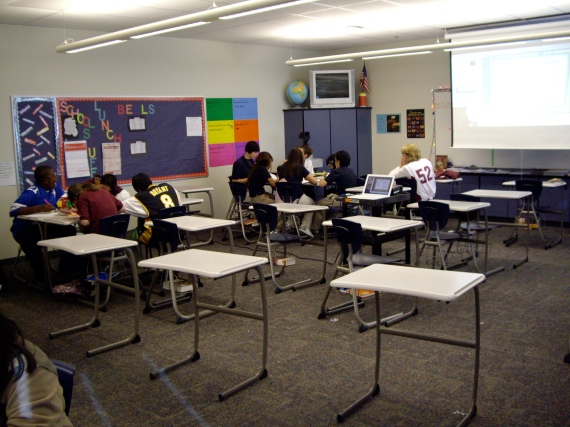
Before class began, we arranged the desks in the class and put the materials at the appropriate stations.  When the students came in, we told them the station that they needed to sit at.  We did this because we knew that this group would struggle with movement after the instructions.  We started the lesson with an introduction to types of sentences.  I created a powerpoint (you can view or download it at this address: http://www.slideboom.com/presentations/32470/Types-of-Sentences ). to introduce the topic and explain the foldable.

After the introduction, we explained the task at each station.  At the subject/predicate station, students had to write one sentence based on a picture and then highlight the subject and predicate in each sentence. This sheet would be used as a pre-assessment for the teacher at her station (the one right after the subject/predicate station).


Subject/Predicate Station

Subject/Predicate Station

We got some good data from this station.  One entire group neglected to add a subject to any sentence.  This allowed the teacher to know exactly where she needed to begin her instruction – even further back than she had anticipated.  

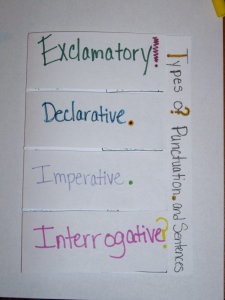
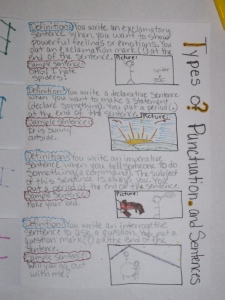
At the foldable station,  students made a hotdog fold and cut out four sections.  Each section would be used to describe one of the types of sentences.  They would write a definition, a sample sentence, and a picture illustrating that picture.  They will use this foldable as a study guide for future assignments.


Types of Sentence Foldable

Types of Sentence Foldable

Inside of foldable.

Inside of foldable.


With our short classes (only 45 minutes), we ran out of time very quickly.  Students did not get to finish the foldable.  We decided to create an overhead and have them finish it as a warm-up.  We would provide the definition and they would add the sample question and picture.  This would provide a quick assessment for the teacher to see if they comprehended the various types at a very simple level.


Students working in stations.

Students working in stations.


At our debriefing, we talked about how great a job the students did, how surprised she was that a group of students didn’t add subjects to any of their sentences, how she adjusted her instruction to that, the fact that students were upset when they couldn’t finish their foldable (how many students do you know who complain when they can’t finish their work?!?), and how to build in the time to finish the foldable during a later class.

All in all, the kids did a great job.  I think that this might be a strategy that will be successful with this class.  

On a different note, the more foldables that I make, the more excited I am about this strategy and using it with students.

Social Studies Stations

I had the opportunity to team teach a lesson in a 6th grade Social Studies class today.  The teacher and I decided to use stations for the structure.  The material was not new (ancient Egypt) so we didn’t have to worry about presenting new information.  We wanted to give the students the opportunity to “play” with the content and review what they knew.

We developed three different station activities with four actual stations.  One of the activities was longer and needed a little more time to complete.

The activities were a 9 square game, decoding hieroglyphs, and creating a foldable using Egyptian cartoons.  Each group would have about 11 minutes to complete a station based on the amount of time in the class.

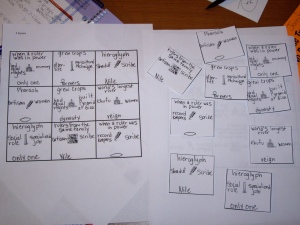
9 square answer key and student copy

9 square answer key and student copy

Student attempt at answering 9 square puzzle.

Student attempt at answering 9 square puzzle.


Decoding Hieroglyphs

Decoding Hieroglyphs

Creating foldable for Egyptian cartoons.

Creating foldable for Egyptian cartoons.


When the students came into the classroom, I had four steps written on the board.  The teacher wanted them to copy down the lesson objective and I wanted them to get out a blank sheet of paper.  I learned a couple of new brain based strategies at the NMSA conference this past week.  One of them that struck me was that we can hold about 10 things in our short term memory at a time.  The speaker (Dr. Kagan) suggested that instead of a warm-up we have students write down everything that is going on in their brain when they first come into class (all the things that are bothering them, what they just learned, what they need to do after school, what they need to remember, ect).  Sort of clear out the short term memory.  I explained to the students why we were doing this and how I would not want the paper.  I gave them one minute to write, but had to extend it as they kept making their list for over two minutes.  I was amazed about how serious they took this activity.  When they finished, I began explaining the stations and they seemed more focused.  I will definitely use this activity again.  I am thinking about having my students do this every day before class.

I then began explaining the various stations.  When I am explaining various activities, I explicitly state what they will and will not do.  I show them the actual materials that they will use to complete the activities.  I make sure that I have an example for them to follow at each station.  I then took them out to their table in the pod area.

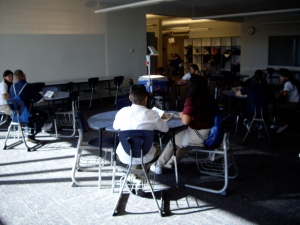
Pod area set up for stations

Pod area set up for stations

They immediately began working.  We made sure that we checked in with each station at the beginning of each rotation to make sure that they understood exactly what they needed to do.  The level of engaged conversation was really incredible.  The 9 square game was by far the most difficult activity, but students also had to work hard to find the information from the cartoons and decode the hieroglyphs.  Out of two classes and almost 50 students, I had one student in one class that was not engaged.  It turned out he just didn’t understand exactly what he needed to do and hadn’t asked another group member or a teacher.

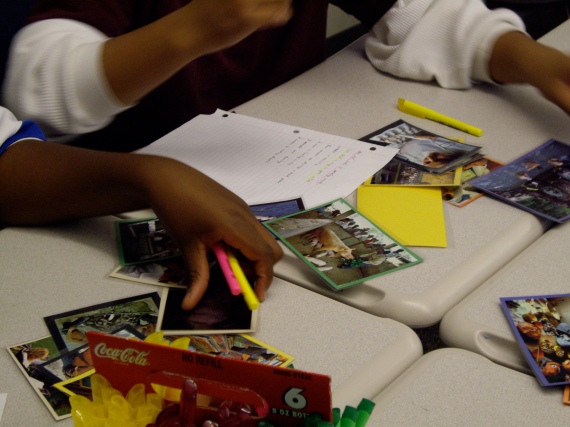
Students working in stations.

Students working in stations.

Another view

Another view


At the end of the class period, I had students return to the classroom and write one thing they learned and one question that they still had on the back of their foldable and turn it in.  This was an exit card and a way for us to assess what they knew and what they were still struggling with.  The foldable can also be used as a review for an assessment.

As an additional exit ticket, I asked each student as they left to tell me one thing they learned.

Overall, we were really pleased with the activity.  The students were engaged in meaningful dialog about the topic and were focused for the entire 45 minutes.  This activity just reminded me how much I like stations.  There is a lot of prep work, but when that is finished, you just facilitate during class periods.  It is a great way to teach.

Newspapers – Day 2

I was very happy with the performance of my students both in finding the text features and working in groups.  I wanted to have them discuss their frequency charts as a follow up to the previous activity.  But first, I wanted to see what new information they had learned about text features.  I decided to have them use the same paper for the first “brain dump” to add any new information that they had learned.  I had them draw a line under their first writing and add any new information that they had learned.  I then had them share their new understandings.

I wanted each student to share an answer, so I borrowed some marbles from another teacher and placed a plastic plate in the middle of each table.

Each student selected three marbles of the same color.  Every time they answered a question, they placed a marble in the plate.  It was an easy way for me to see who has shared.  I discovered, however, that marbles (or anything else that rolls), is not the way to go.  I will be purchasing some colored chips to use in the future.  The marbles struggled to stay in the plate and they rolled across the table too easy.


I had my overhead set up in the pod area and I had one complete copy of the newspaper on each table.  I had students move into the area and sit in groups. I displayed one question at a time and had the groups discuss the answer.  After every person had answered, I asked one person to tell me what another group member had said.  I discovered that they struggled with really listening to their group members.  It allowed me to assess their listening and retelling skill levels.

I need to work on group sharing and listening in my future activities.