Archive for December, 2008

Holiday Letter


As part of my continuing attempt to create authentic writing experiences for my students, I had my students write a holiday letter and mail it to a person of their choice.  There were many benefits and lessons to be learned here – friendly-letter format, summarization (milestones of their year), what a full address is, addressing an envelope, and the purpose of a holiday letter.

Here is what I discovered.  Even though my students are in middle school, most of them don’t know what constitutes a full address, they don’t know how to address an envelope, they have difficulties coming up with things to write about, and they were completely amazed that I was going to mail their letters.

We started by creating a foldable for friendly letters.  They needed to know the format before they could write an appropriate letter.  I created a powerpoint that broke the letter into three parts.  You can view and download the powerpoint here:  http://www.slideboom.com/presentations/36868/Friendly-Letter

This is what their foldable looked like:
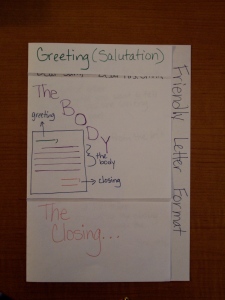
 

Outside of foldable
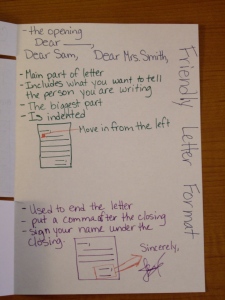
Outside of foldable

Inside the foldable

Inside the foldable


We stapled these into their spirals so that they could reference them, both for the holiday letter and their epals e-mails.

After they made their foldable, we started talking specifically about holiday letters and their purpose.  I brought several examples for them to peruse.  I prepared a powerpoint that shared topics, mood, and overall purpose for the letter.  This seemed to help several of my students decide on topics and the type of letter that they wanted to write.  You can view and download the powerpoint here:  http://www.slideboom.com/presentations/36907/Holiday-Letter

They finally started writing their letters.  I created a basic letter format that they would copy their final draft onto.  It had some generic pictures and text boxes on it.  It wasn’t that big, so they didn’t have to write a lot of information.  This was actually a good thing, because some of them really struggled with things to write about.

Here is what I would change next time:  I would give them more time to work on the project.  Some students struggled getting all of their information written, edited, and their envelop addressed.  I also need to work further on editing skills.  It is something that they are not proficient at.  I do feel, however, that this was a very worthwhile project and will probably expand it a little and repeat it next year.
Amazon Book Reviews – Rubric Creation

Before my students started writing their own book reviews, I wanted to make sure that they knew the target that they needed to aim for – that is what I call a rubric.  We used the same four sections from the book review highlight activity:  who should read this book?, descriptive words, plot, and opinions.  We added three optional categories:  characters, genre, and rating.  After we had each of the topics that they needed to include, we started filling out a rubric together on the overhead.  Since we had created a booktalk rubric together earlier in the year and they had been assessed on the rubric, they were familiar with the possible scores they could receive in each area:  advanced, proficient, partially proficient, unsatisfactory, or no attempt.  We usually fill out the advanced first, then work our way down the scale.  We listen to everyone’s ideas and come to a consensus.  After we create the rough draft, I type up the information, create an overhead and have my classes review the information.  I want to make sure that they agree to everything on the rubric, because that is what they are going to be required to do.

Each of the rubrics look a little different, based on the decisions of each class.  Here is an example that my class came up with:

book-review-rubric1

So, after the creation of the rubric, it was time for them to write their own book review…to be continued.

Language Arts Stations

I have been working with a teacher who has an 8th grade Language Arts class that has quite a few ELL and SPED students.  She is struggling to find a way to meet the diverse needs in the class, work with students in small groups, and maintain classroom management.  I talked to this teacher about coming in and co-teaching with her.

I met with the teacher to plan out the lesson and decide what she wanted the focus to be.  She has been working on determining the subject and predicate in sentences and is moving into the different types of sentences.  She also wanted to be able to meet with a small group of kids.  We decided to set up stations.  She would create groups based on some classroom data.  That way when a group came to her, she would be able work on specific skills that that group was missing.  The four stations that we decided on were:  teacher station, creating sentences finding the subject and predicate, types of sentences foldable, and a parts of speech bingo.  I would create the foldable, provide the game, and an introduction to types of sentences.  She would create the stations, the subject and predicate station, and her teacher station materials.

Before class began, we arranged the desks in the class and put the materials at the appropriate stations.  When the students came in, we told them the station that they needed to sit at.  We did this because we knew that this group would struggle with movement after the instructions.  We started the lesson with an introduction to types of sentences.  I created a powerpoint (you can view or download it at this address: http://www.slideboom.com/presentations/32470/Types-of-Sentences ). to introduce the topic and explain the foldable.

After the introduction, we explained the task at each station.  At the subject/predicate station, students had to write one sentence based on a picture and then highlight the subject and predicate in each sentence. This sheet would be used as a pre-assessment for the teacher at her station (the one right after the subject/predicate station).


Subject/Predicate Station

Subject/Predicate Station

We got some good data from this station.  One entire group neglected to add a subject to any sentence.  This allowed the teacher to know exactly where she needed to begin her instruction – even further back than she had anticipated.  

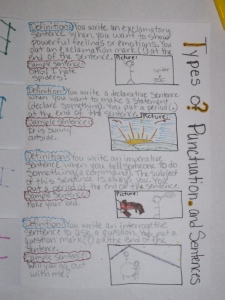
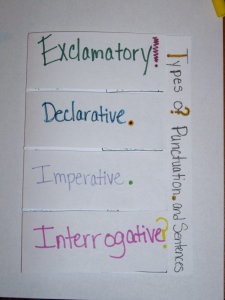
At the foldable station,  students made a hotdog fold and cut out four sections.  Each section would be used to describe one of the types of sentences.  They would write a definition, a sample sentence, and a picture illustrating that picture.  They will use this foldable as a study guide for future assignments.


Types of Sentence Foldable

Types of Sentence Foldable

Inside of foldable.

Inside of foldable.


With our short classes (only 45 minutes), we ran out of time very quickly.  Students did not get to finish the foldable.  We decided to create an overhead and have them finish it as a warm-up.  We would provide the definition and they would add the sample question and picture.  This would provide a quick assessment for the teacher to see if they comprehended the various types at a very simple level.


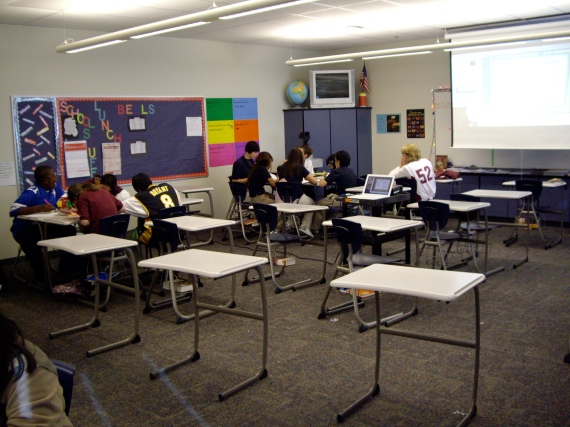
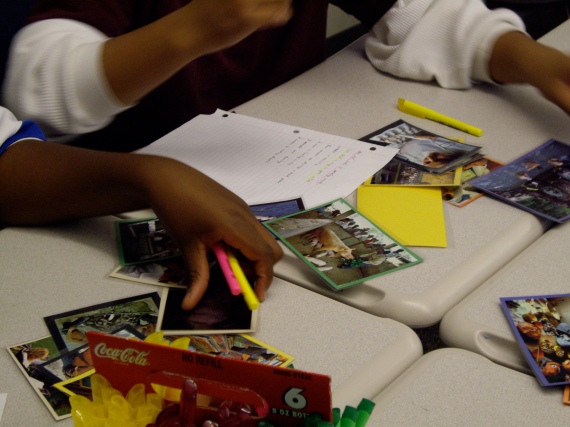
Students working in stations.

Students working in stations.


At our debriefing, we talked about how great a job the students did, how surprised she was that a group of students didn’t add subjects to any of their sentences, how she adjusted her instruction to that, the fact that students were upset when they couldn’t finish their foldable (how many students do you know who complain when they can’t finish their work?!?), and how to build in the time to finish the foldable during a later class.

All in all, the kids did a great job.  I think that this might be a strategy that will be successful with this class.  

On a different note, the more foldables that I make, the more excited I am about this strategy and using it with students.

Building Background

The longer I teach, the more I realize that activating my students’ background knowledge about a topic is critical.  I find this especially true with ELL students.  There are lots of ways to find out what your students already know about a topic and what misconceptions they have.  This is also incredibly important – what do students not understand.  

There are several ways that I try and get at my students’ knowledge beyond KWL charts or having a whole class discussion.

Brain dump – where students draw a picture, give an example, or write down everything that they know about a topic or vocabulary words or a process, etc.  I might have students do this as a warm-up activity, an exit ticket, or at the beginning of a unit.  If it is an exit ticket, I would assign it before we started a new unit or topic.  That way I can collect some information that informs my instruction in the unit.  There are many off-shoots or extensions for this activity.  After students have written, you can group them using a Kagan structure (like HandUp, StandUp, PairUp) and have them share their thinking (maybe using RallyRobin).  This allows them to hear about many sets of knowledge.  You need to keep in mind that some students might share some incorrect information.  This is why you will probably want to collect their writing – so that you can address these.

What is the topic?  – You can use this strategy when you are introducing a new topic.  You write vocabulary words on the board (or overhead, etc) and based on the words, the students must decide what you will be focusing on.  This allows you to see if your students have any frame of reference for the topic.

What words don’t fit? – This activity is similar to the previous, except the students are told the topic and they must decide which words written on the board (or overhead) should be included in the unit and which words should be discarded. 

My colleague, Laura Zoromski, has created a great building background activity that she uses in her math class.coordianate-graph-explanation Click on this link to view an example and the explanation.

If you have a specific set of vocabulary words that you will be teaching, you can have the students pre-assess their familiarity with the words.  You can create a basic chart that lists the word and options on a knowledge continuum.  vocabulary-checklist Click on this link to view an example.  After you have taught the unit, have students re-evaluate where they fall on the continuum.

By no means is this an exhaustive list of strategies, but these are some simple, quick, and useful ways to help your students activate their background knowledge.